ASSEMBLING THE ARDUINO
Arduinos are small microcontrollers (i.e., computers) that can be used to accomplish certain objectives. The allow you to have a lot of control over whatever project you are working on. Before beginning assembly of the Arduino payload, it’s good to know more about how they work and what we can do with them. Begin by watching the video below to learn more about the very basics of Arduinos.
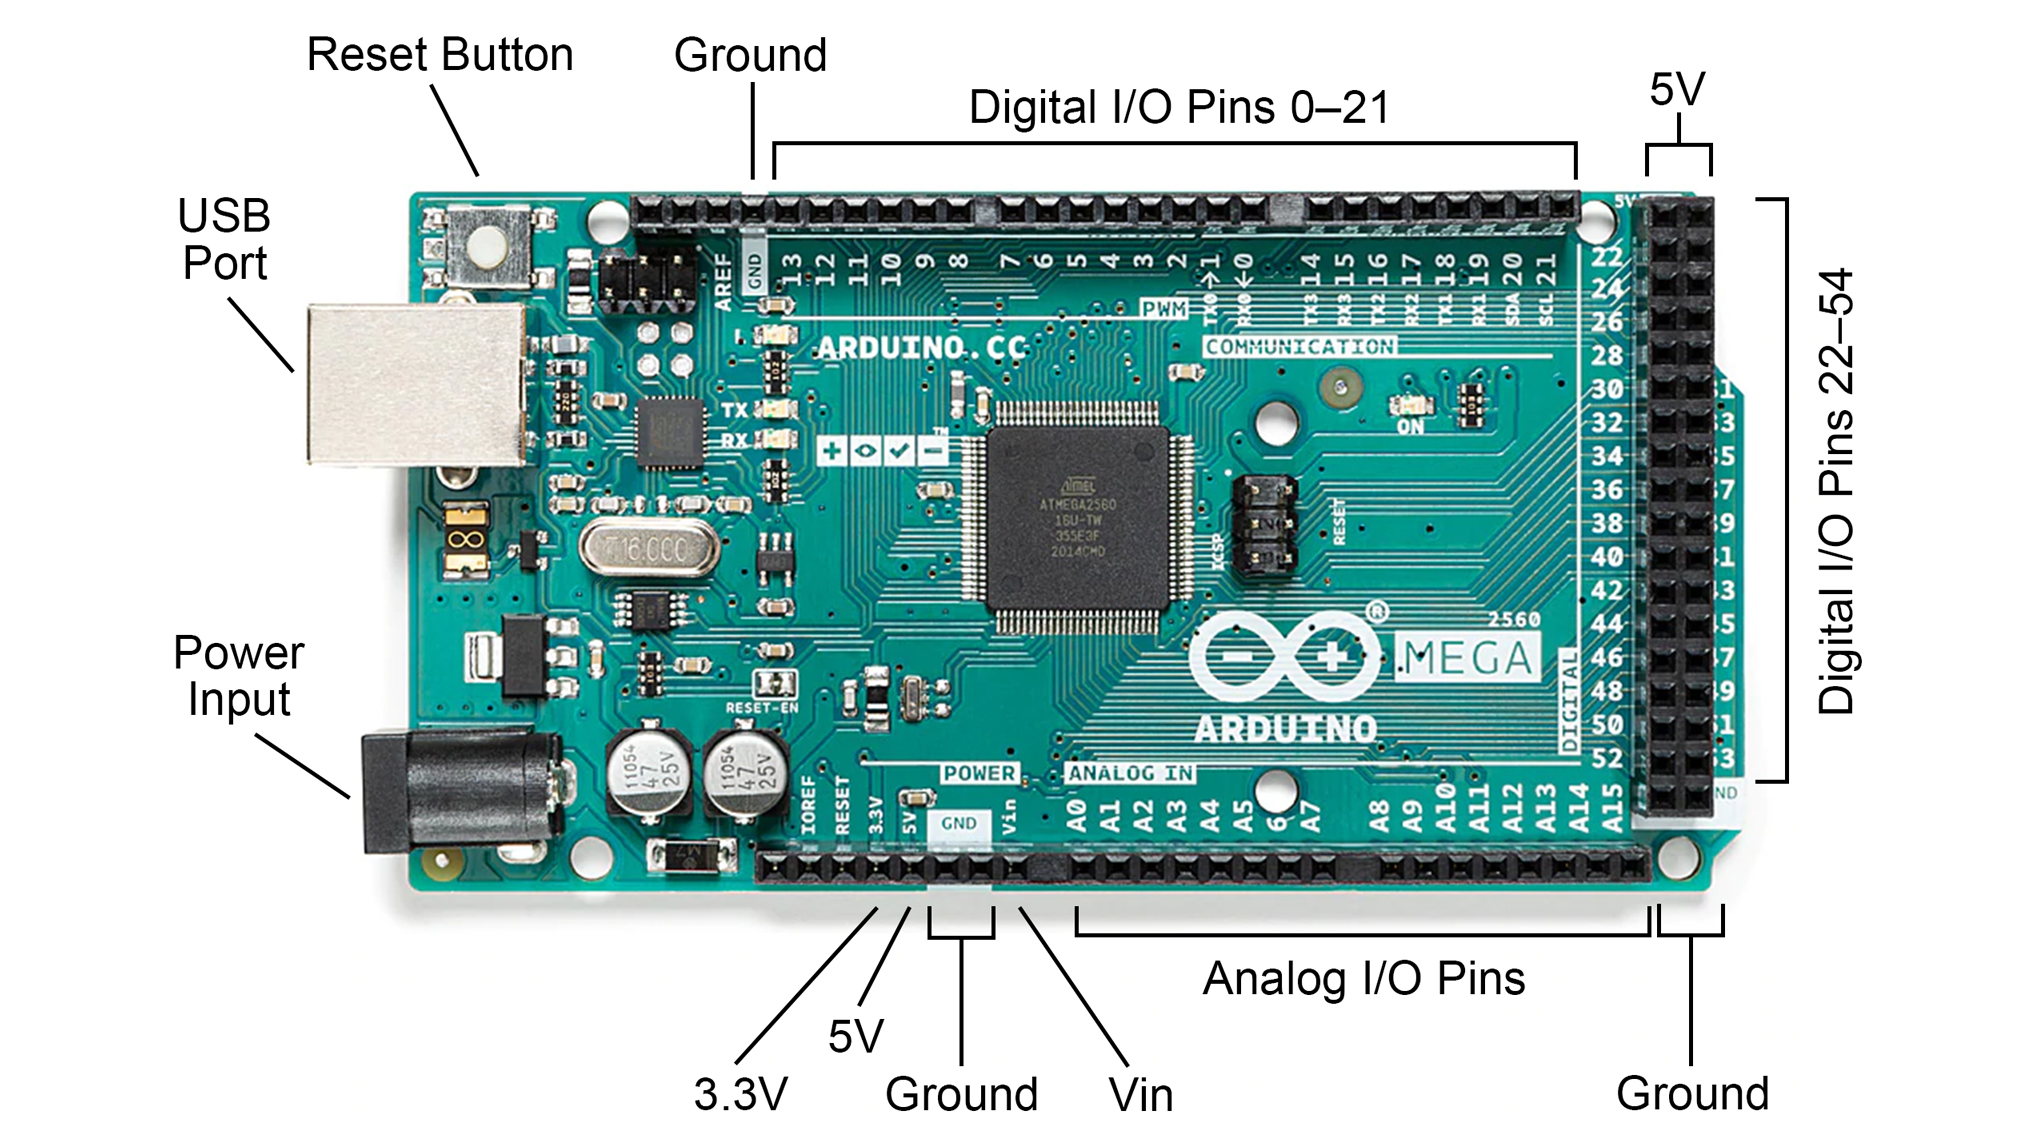
The Arduino Mega is the largest and most powerful Arduino on the market today. It has a total of 86 pinouts, many more than the Arduino Uno shown in the video. These pinouts can be used to plug in wires connected to other electronic components in your project. They allow you communicate with or provide power to these other components.
Take a look at your Arduino Mega and identify the different types of pinouts. They all have labels that mean something (see figure below). Some are used to provide power to electronics (3.3V, 5V, Vin, GND), others are for analog input/output (I/O) signals, and a bunch more are for digital I/O signals. Most of these pinouts will not be used for this activity.
The video above mentioned an Arduino add-on component called a “shield”, which slides directly on to the top the Arduino. In Step 2 of the assembly, we will be installing one of these shields into our Arduino.
However, before we do anything else let’s first go to Step 1 and make sure we have all of our parts.


