

BALLOON LAUNCH 101
OVERVIEW
- EQUIPMENT & PAYLOAD
- HELIUM
- STEP 1 — REQUESTING A LAUNCH
- STEP 2 — PREPARING FOR A LAUNCH
- STEP 3 — MISSION CONTROL & SOCIAL MEDIA
- STEP 4 — MONITORING THE FORECAST
- STEP 5 — LAUNCHING THE BALLOON
- STEP 6 — CHASE & RECOVERY
- STEP 7 — FOLLOWING UP
Here we discuss everything that goes into one of our balloon launches. When scheduling balloon launch events, we solicit requests from teachers asking for us to do a launch at their school. For each launch, we send up equipment to record video and track the balloon during flight. The K-12 students are given the opportunity to send up their own balloon payloads as well.
Once the balloon bursts and the payload falls back down to earth, we attempt to retrieve it—either by vehicle or on foot. Following the event, students examine their own payloads to see if their hypotheses were correct. We also give teachers access to all the onboard GPS and meteorological data, as well as footage captured by our HD cameras.
We describe this entire process in more detail in the following sections. If you’re interested in learning even more, we suggest also checking out our Ballooning FAQs. Don’t hesitate to reach out to us with any other questions!

EQUIPMENT & PAYLOAD
For our launches, we use high-quality latex weather balloons manufactured by Kaymont. They produce a large range of balloon sizes (given in terms of mass), from 200 g up to 3000 g. These range in price from about $20 for the smallest balloons to over $400 for the largest. Smaller balloons are intended for lighter payloads, have a smaller burst diameter, and thus have a lower maximum burst altitude. We typically use mid-size balloons of either 1200 g or 1500 g, which have maximum burst altitudes of 90,000+ feet for the payloads we launch. However, we have also launched balloons as small as 600 g and as large as 3000 g.
The payload consists of everything that the balloon carries during flight. For our launches, this includes (from top to bottom):
- 72-inch parachute
- The SatCom, our primary GPS tracking and sensor package
- HD video recording package
- Student payload box(es)
- Backup GPS tracking device(s)
All items are attached to each other and to the balloon via a series of nylon harnesses and high-strength cords. There are payload weight limitations that are discussed below. Aside from the student payload boxes, we bring all of the payload items with us on launch day.

Parachutes
SatCom Flight Computer
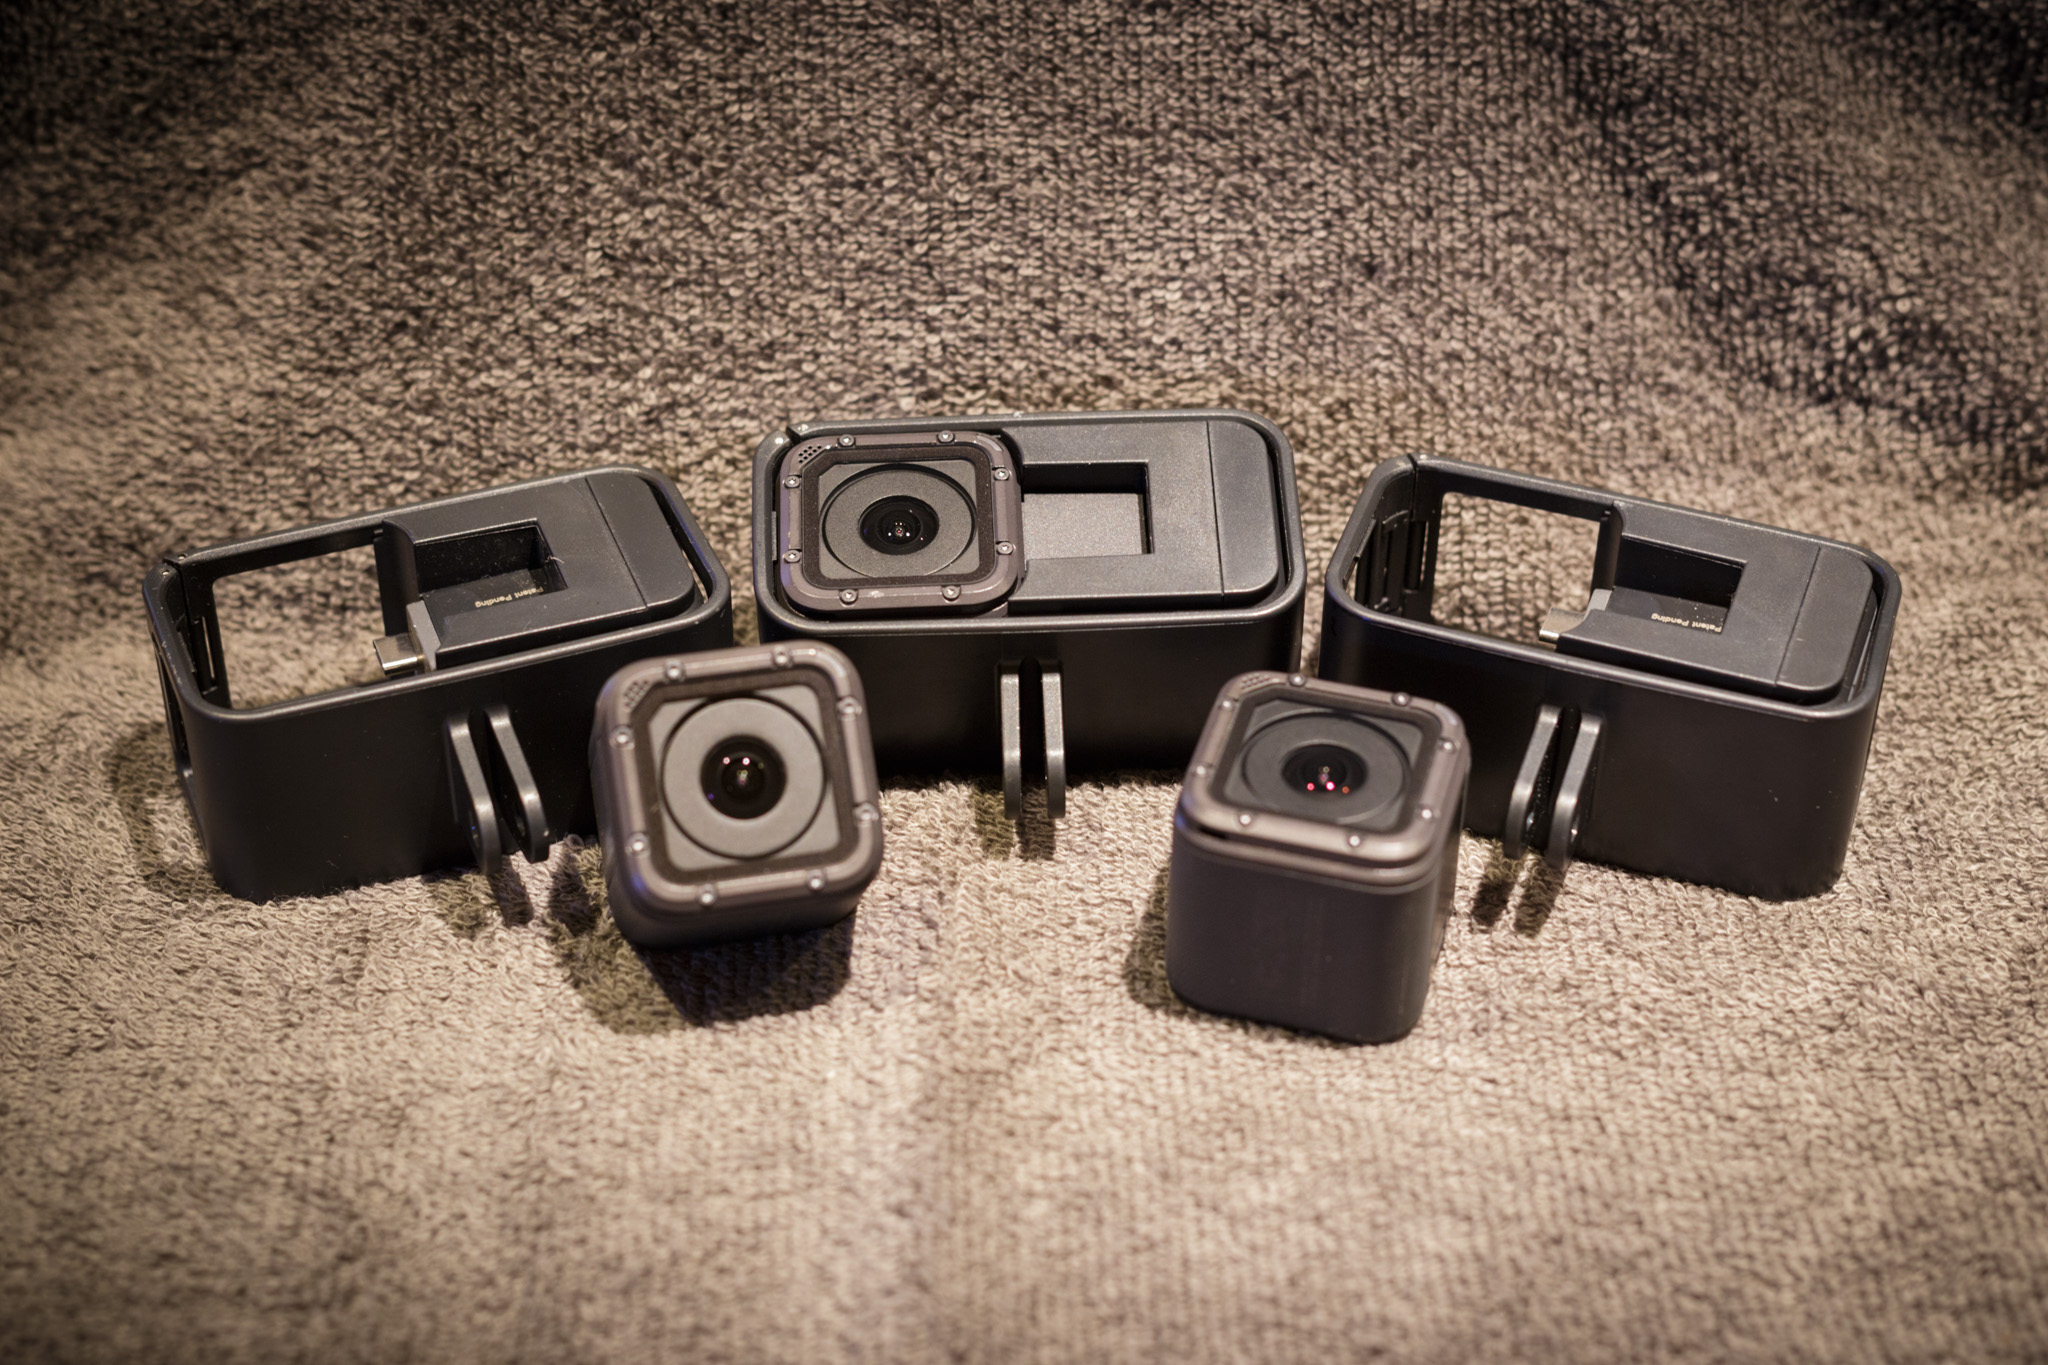
GoPro Cameras
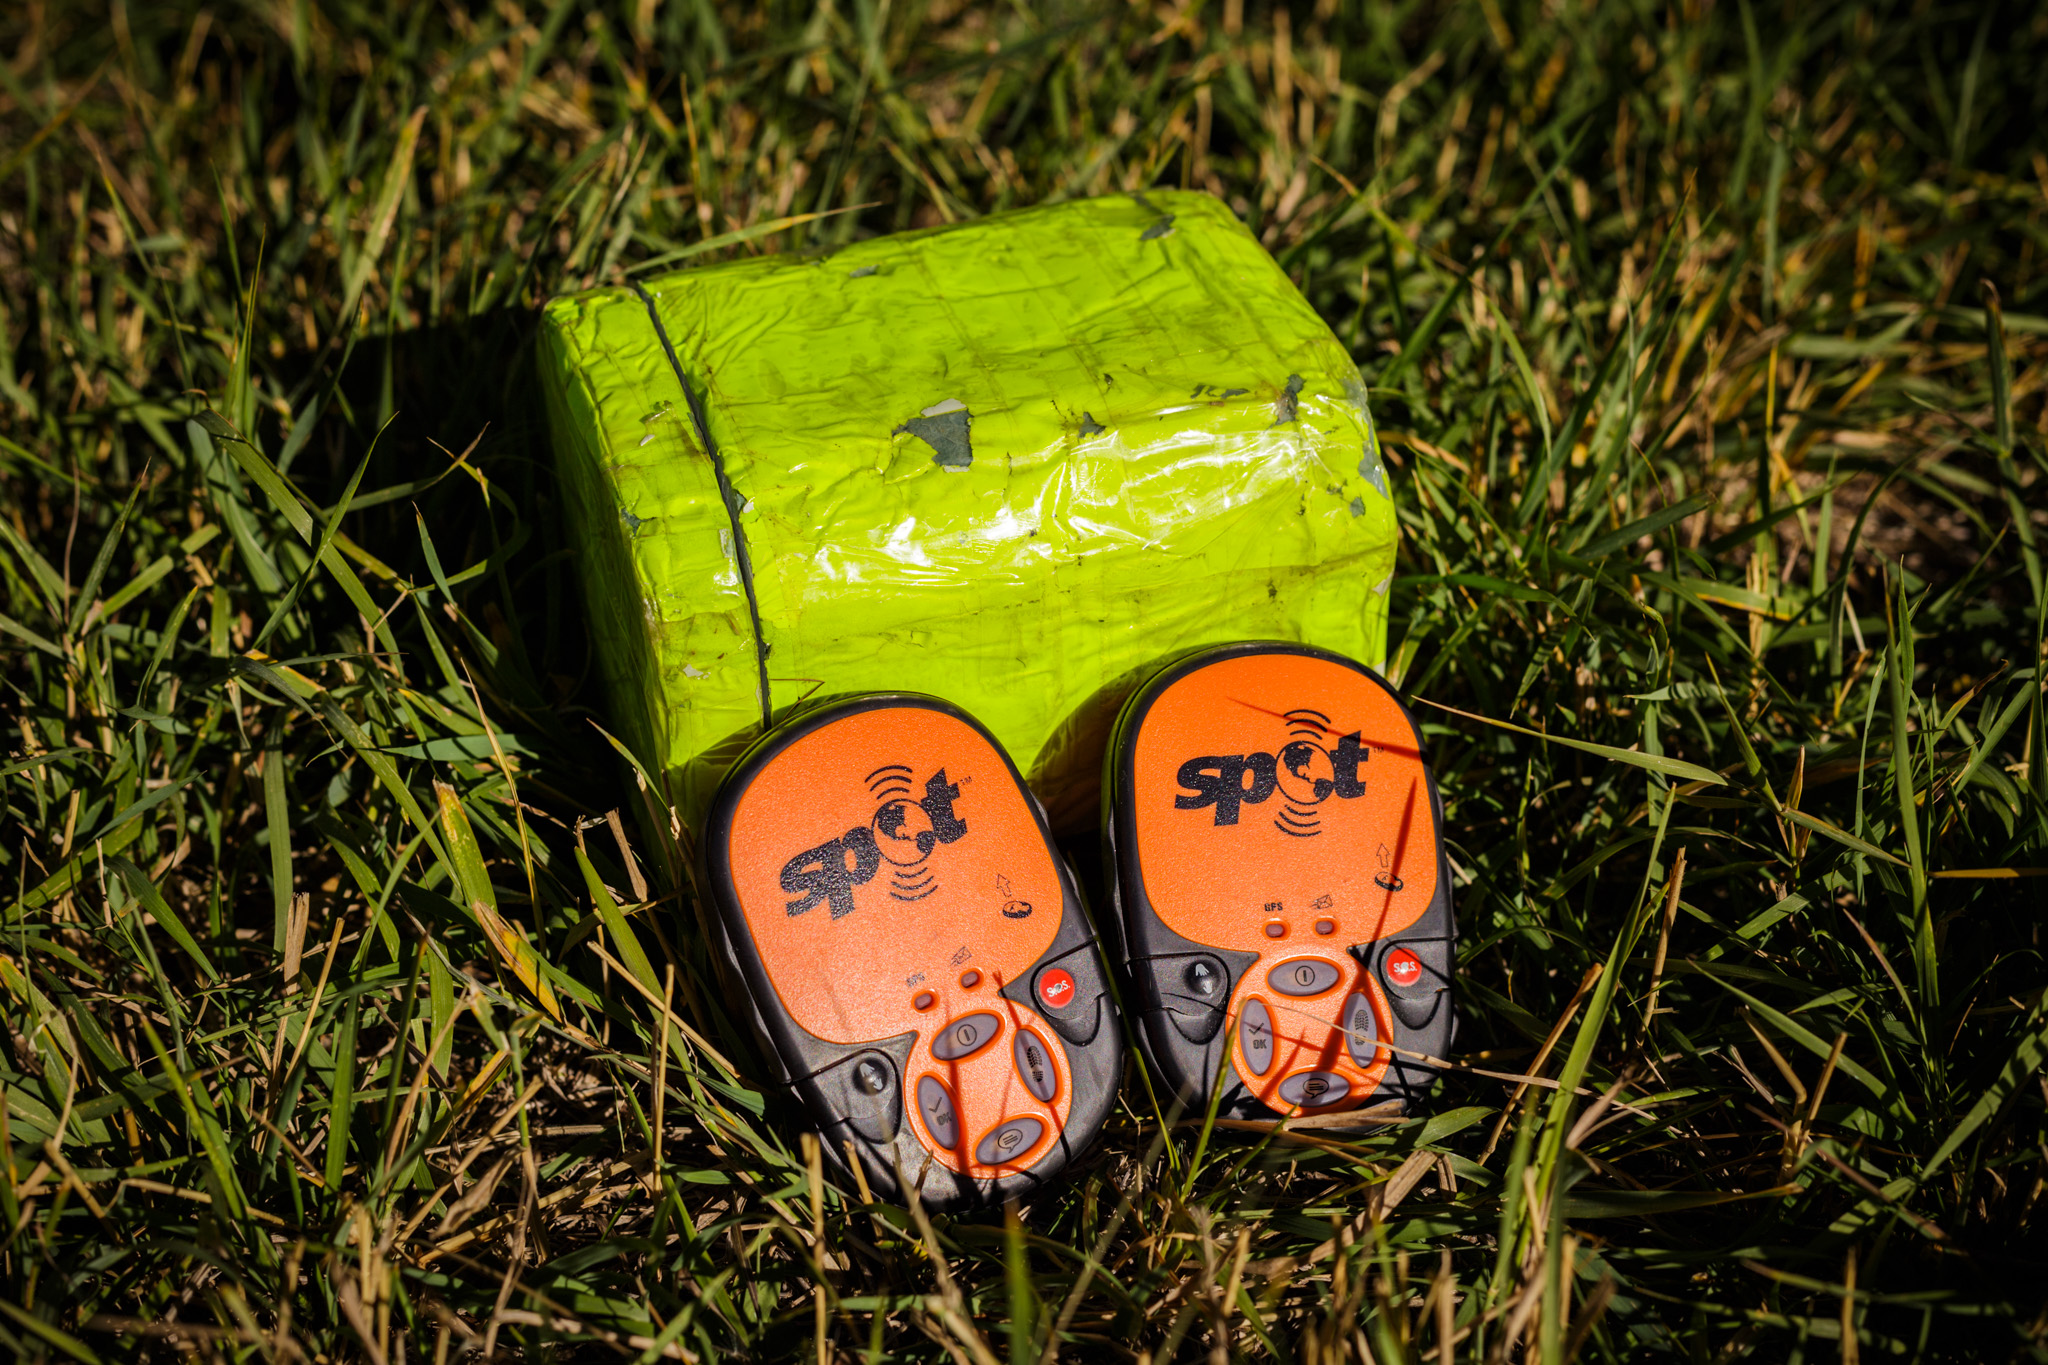
SPOT GPS Trackers
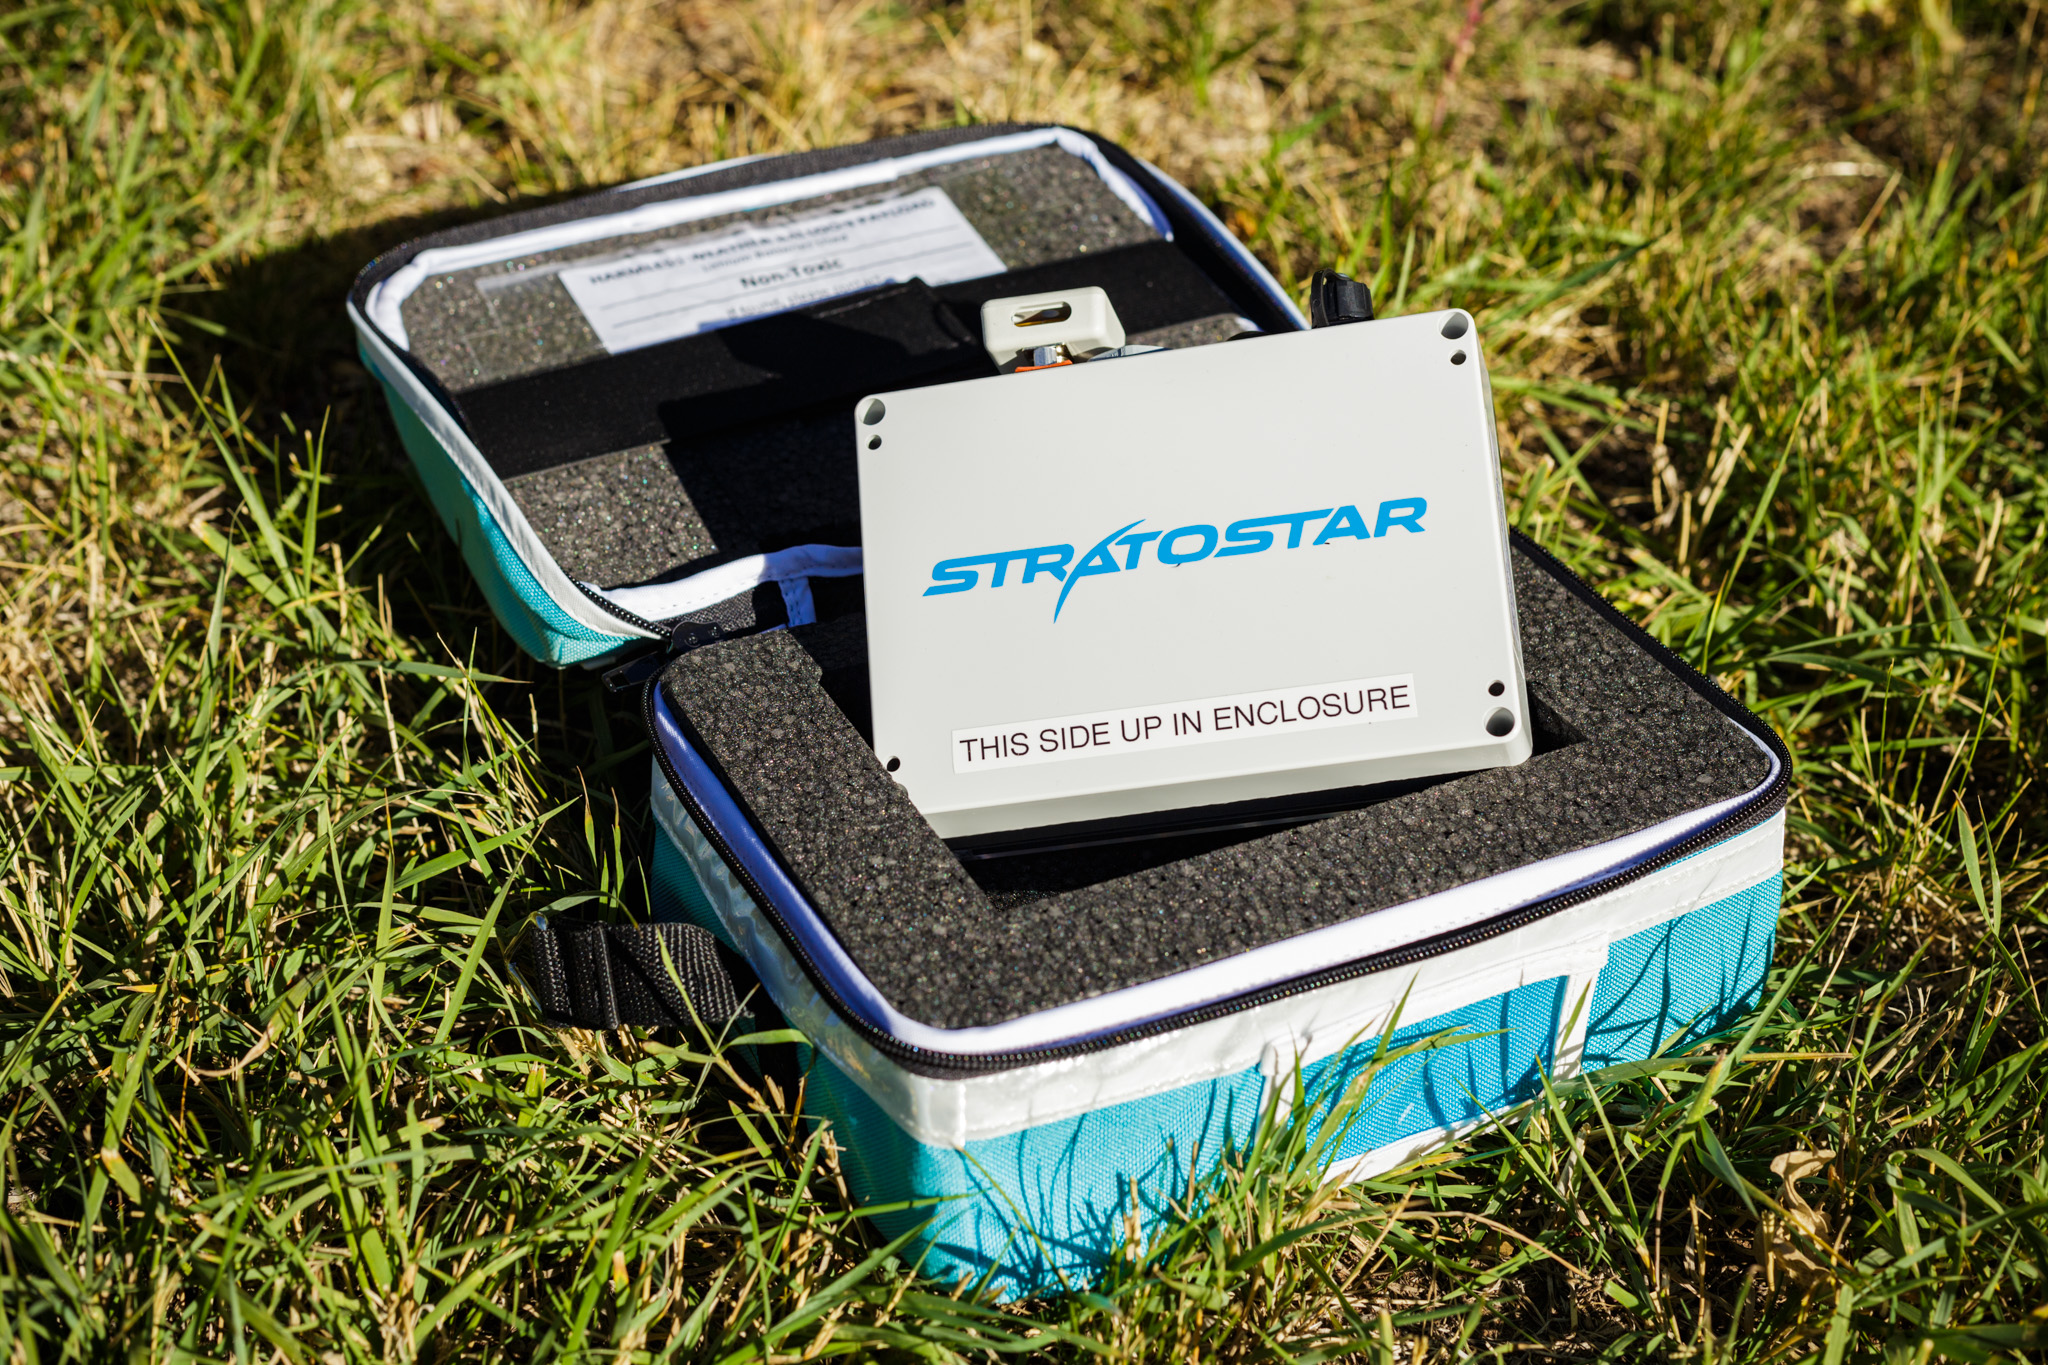
SATCOM
The SatCom (Satellite Communication) package we use is built by a company called Stratostar. It includes GPS tracking technology and is equipped with a suite of sensors measuring things like temperature, air pressure, relative humidity, acceleration, and rotation. It also uses the GPS measurements to determine wind speed and direction. During flight, the SatCom transmits its data to the Iridium satellite network once every minute. The satellites then send the data directly to the internet, allowing us to monitor the data and track the payload in real time from our computers or smartphones.
VIDEO FOOTAGE
Our video recording package typically includes three small, lightweight GoPro HERO5 Session cameras. We usually record footage at 1080p resolution and 60 frames per second. For longer battery life, each camera is mounted with an extended battery pack that usually supports continuous recording for up to 3 hours. If requested, we can provide the raw footage from these cameras to teachers after the launch.
BACKUP GPS
For backup GPS tracking, we use two SPOT GPS trackers mounted back-to-back in a separate box at the bottom of the payload. These transmit their GPS position and altitude to the internet via the Globalstar satellite network once every 10 minutes. They tend to have extraordinary battery life and can usually track continuously for several days.
OTHER EQUIPMENT
We use iPads to interface with the SatCom prior to launch and to remotely monitor the SatCom data during flight. A helium regulator and hose allow us to precisely (and safely) control the flow of helium while filling the balloon. During the filling process, we attach a fish scale under the balloon to measure the balloon’s free lift. We use a combination of zip ties and PVC pipe allows to secure the payload to the neck of the balloon. Both smartphone GPS apps and handheld GPS devices, loaded with public/private land maps, are very helpful during payload recovery. We also have physical BLM maps for the entire state of Wyoming.
TEACHER’S ROLE
The only equipment you need to worry about are your student payloads (see below). We will take care of the rest!
HELIUM
HELIUM TANKS
We use helium instead of hydrogen since it is much less dangerous. Typically, we will rent two large, high-pressure helium cylinders (or “tanks”), either K-size (200 cubic ft) or T-size (300 cubic ft). Each of these steel tanks is over 4 feet tall, 9 inches in diameter, and weighs more than 120 pounds. Needless to say, they should be handled with care!
Having two tanks is necessary for the majority of our launches. It usually takes about 300 cubic feet of helium to fill the balloon so that it has enough free lift to carry the payload upward at an acceptable ascent rate (i.e., about 5–6 m/s). With K-size tanks, this almost always requires us to use some helium from the second tank. With T-size tanks, the second tank acts as a backup in case we have an accidental balloon failure (i.e., burst) while we are filling it.
GETTING HELIUM
The vast majority of the time, we provide the helium for the launch. On rare occasions, the teacher’s school has either provided or offered to pay for the helium. Although we welcome such offers, we certainly do not require our host schools to do this. Indeed, our annual budget accounts for the helium we purchase for these launches. The cost to rent helium tanks in Wyoming for a single launch can be quite high, often in excess of $200/tank.
We have worked with multiple helium suppliers over the years. Several of them are in Laramie, including one on the UW campus. Two of the larger suppliers in the area, each with many branches across Wyoming and surrounding states, are Airgas and Norco. We sometimes get helium from our local welding supply store.
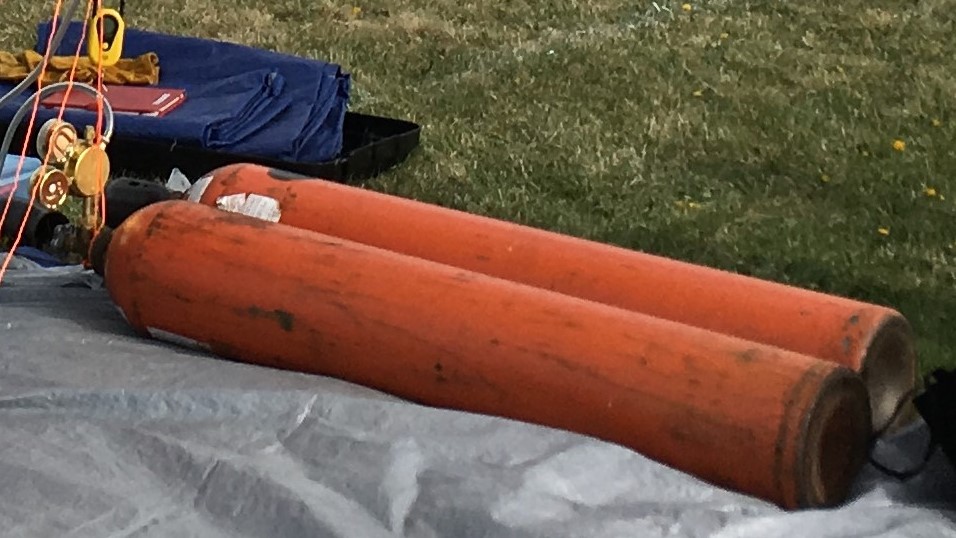
Helium Tanks
DELIVERY AND SAFETY
These days, we will typically bring the helium with us from Laramie. However, we will rarely try to have the helium tanks delivered directly to the school/building where we’ll be launching, usually a day or two before the launch. In this case, someone will need to make sure the tanks are stored in an appropriate location. Many schools/buildings have an area designed for this purpose, such as a custodial room. Closets and other storage areas can work too. The tanks should be stored upright and ideally secured to a wall with chains, or nudged into a corner with something heavy, so that they cannot be knocked over. As a very last resort, the tanks can be stored laying down as long as they are out of the way of foot traffic and will remain undisturbed until the launch. Children should be kept away from the tanks at all times!
TEACHER’S ROLE
If you would like to offer to purchase or provide the helium, please let us know as soon as possible! Otherwise, we will take care of it. If we decide to have it delivered to your school/building, you need to make sure that the tanks are stored in an appropriate location and are left undisturbed until launch day.
STEP 1 — REQUESTING A LAUNCH
Teachers or educators interested in hosting a balloon launch must submit a K-12 Balloon Launch Request Form. We are no longer taking requests directly via email. On the request form, we ask for a preferred launch date and time, as well as any potential alternate launch dates. When we receive a request, we check our schedule to see if we can accommodate the preferred date. If we are able to schedule a launch on one of these dates, we will also work with the teacher to select another date to serve as a backup in case of poor launch conditions on the first date.
Depending on availability, we may have to put a request on our wait list and try to schedule a launch at some other point in the future. This sometimes requires a wait of more than a year. We also tend to give priority to new groups that have not yet launched with us before. In addition, although we’ve conducted most of our launches with K-12 groups (schools, summer camps, after school programs, etc.), we have launched with other educational groups as well (e.g., Casper Planetarium, Casper College).
TEACHER’S ROLE
Submit a request and wait to hear back from us. Please provide as much information as you can. If you aren’t sure if your group is eligible to host a launch, please don’t hesitate to reach out to us.
STEP 2 — PREPARING FOR THE LAUNCH
STUDENT PAYLOADS
Several weeks before the scheduled launch date, we send out three Styrofoam payload boxes to the teacher. Students will use these boxes to carry whatever materials and/or experiments that they would like to send up with the balloon. We recommend that everything be consolidated into as few boxes as necessary. It is ultimately the teacher’s responsibility to make sure that these boxes are ready to go by launch day. We can help with this and provide suggestions for things to try out, but we do encourage the students to try to come up with their own ideas, experiments, and hypotheses.
There are a few “prohibited items” that we do not allow to be included in our payloads. These include live animals, highly flammable liquids, anything explosive or easily combustible, and obviously any other items that are illegal to possess. We also recommend that participants avoid sending up large quantities of liquid (e.g., soda bottles), since that quickly adds weight to the payload. Rather, try to follow the “TSA rule” and keep liquids to less than about 3 ounces per container. If participants do want to send up liquids or other potentially messy materials, we ask that they be enclosed in a plastic bag or some other protective casing.
The FAA requires that the entire payload (i.e., everything below the balloon) must not weigh more than 12 pounds. Since our payloads also include GPS tracking and video recording equipment, we require that our participants keep the TOTAL weight of ALL their payload boxes to 6 pounds or less. It’s pretty difficult to get to 6 pounds unless heavy equipment is included (i.e., LabQuest units, large batteries, etc.).
Prior to launch, teachers need to make sure that everything is safely secured to the boxes. We typically use either zip ties, glue, or duct tape. Items may be placed on the outside of the boxes, however on launch day we must be able to attach a payload harness to each box (see image below). Please do not place any sharply pointed objects on the outside of the boxes since that could lead to an injury.
To summarize, here are the rules for the student payloads:
- The total combined weight must not exceed 6 pounds
- Consolidate into as few boxes as necessary
- No illegal items or live animals
- No items that are highly flammable, explosive, or combustible
- No sharply pointed objects sticking out of the boxes
- Use liquids conservatively and enclose potentially messy items
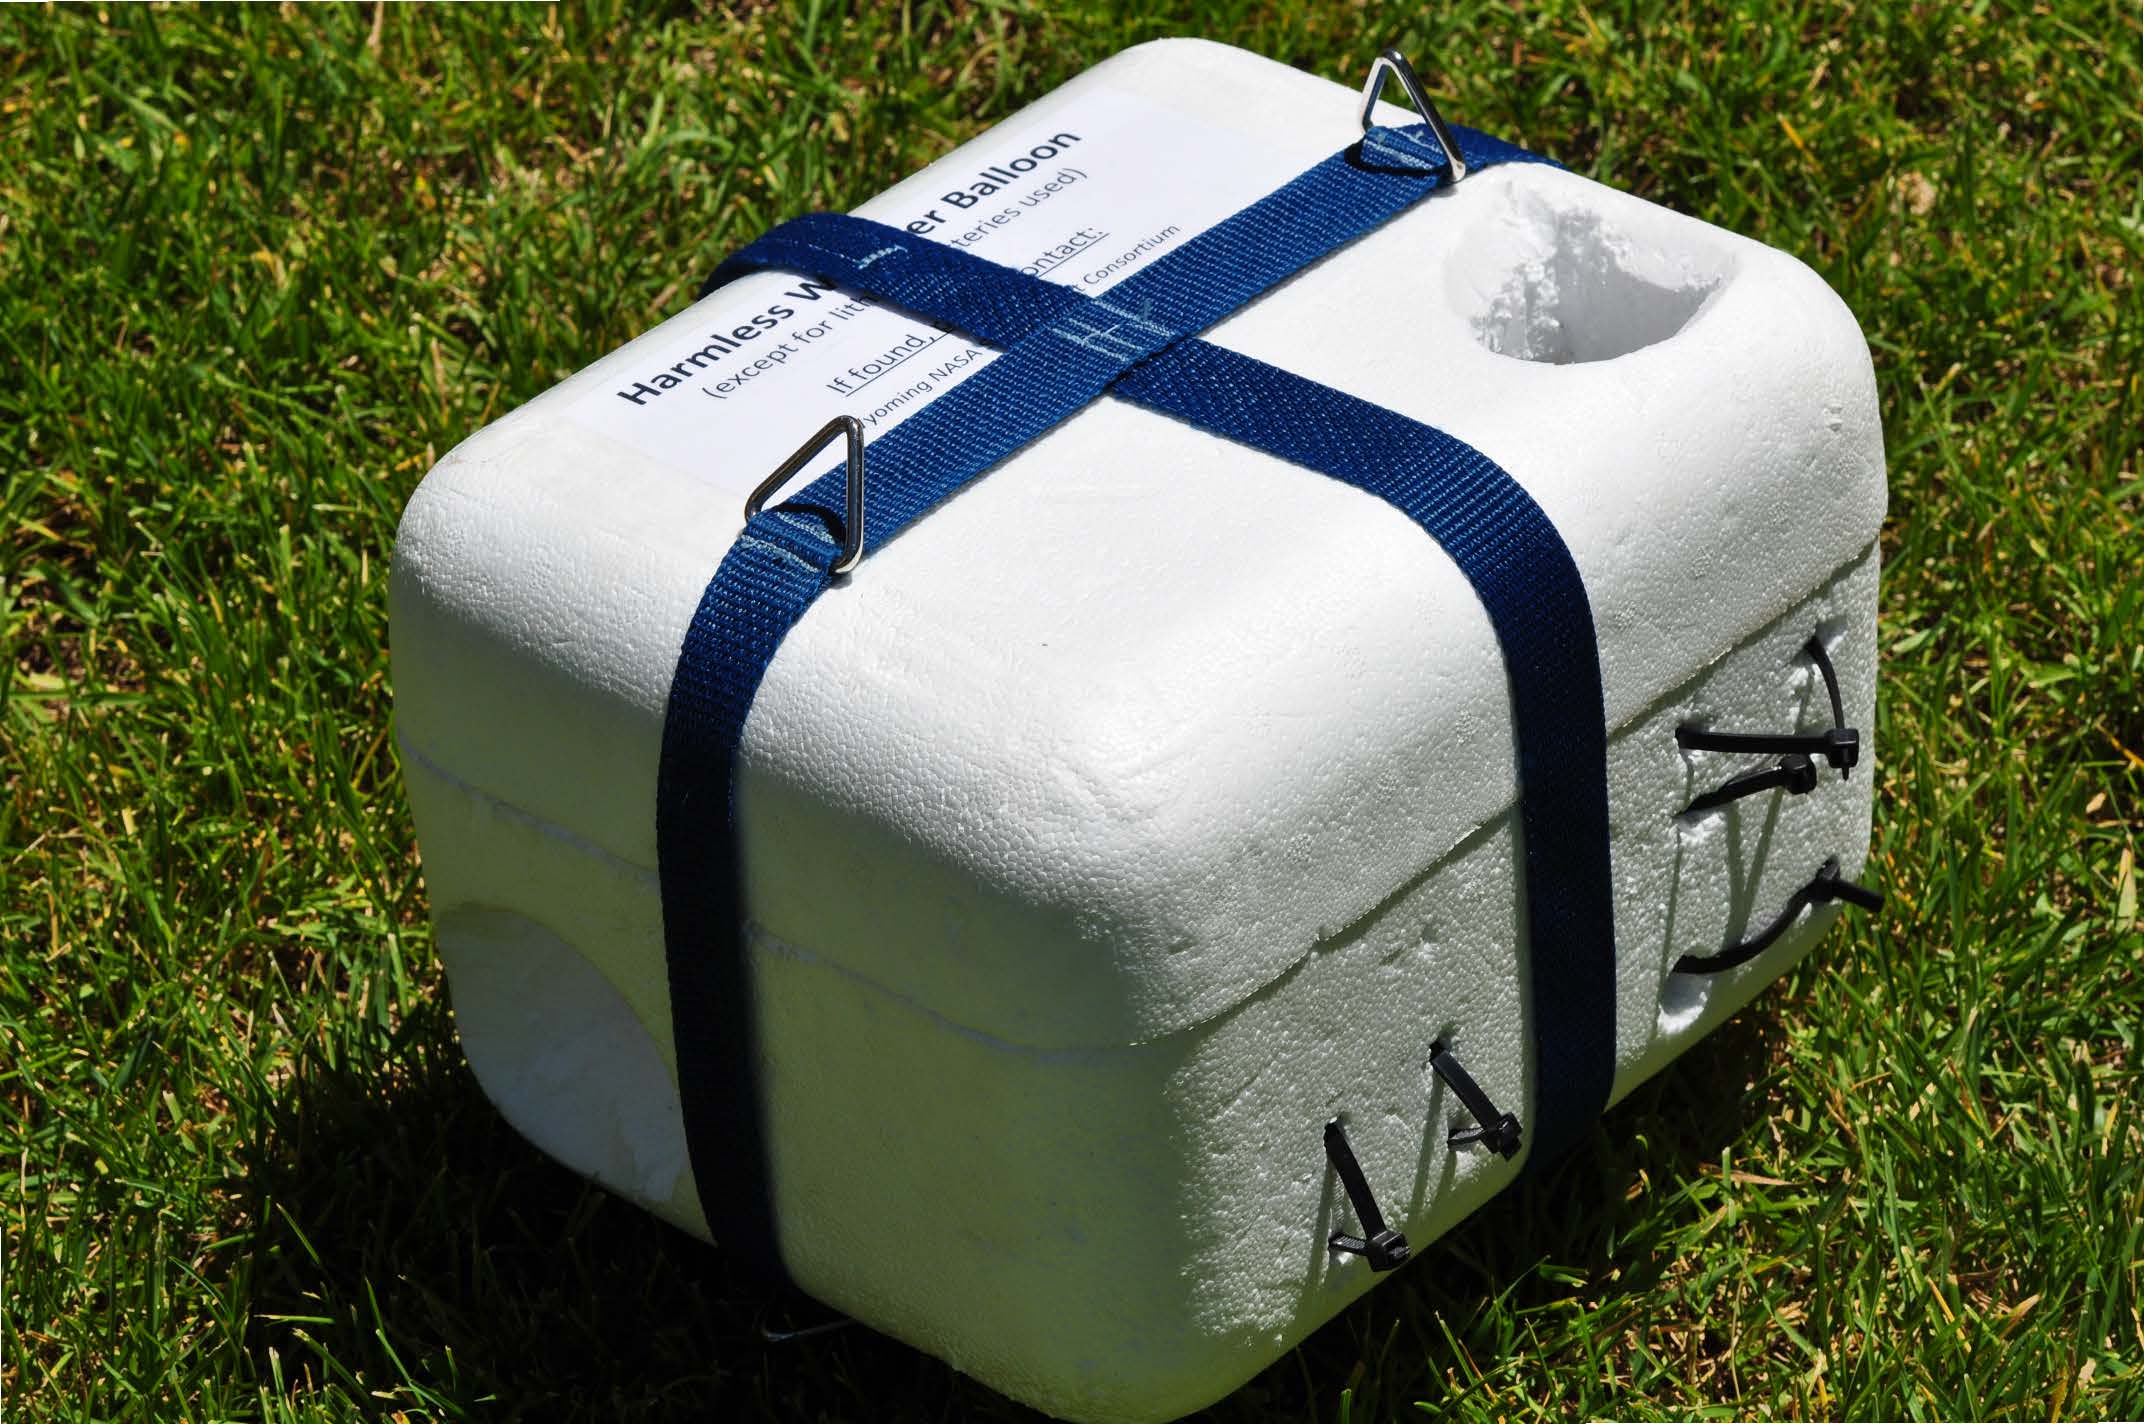
Student payload box with harness
LAUNCH SITE
Teachers are also responsible for identifying potential launch sites. Most of the time, we launch from an appropriate location at the school, but we are certainly fine with launching off campus if that is preferred. Depending on where the school is located, launching from off campus may in fact be ideal.
Good launch sites are out in the open and far from power lines. A large grassy area (e.g., the football field) or a parking lot are our favorites, especially if wind is an issue. The less windy it is on launch day, the more confined a launch site can be.
If it is breezy on launch day, we will likely need to be able to fill the balloon in a spot that is somewhat sheltered. This could be outside or inside. Good outside spots tend to be right next to, and downwind of, a building. The taller the building, the better. For example, if the wind is coming from the west, a good spot would be on the east side of the building. Of course, the wind may be coming from any direction on launch day, so it’s good to have several options in mind. A good inside option would be a gymnasium or garage. However, there must be direct outside access from this location, preferably via large garage doors. The balloon can be anywhere from 7–10 feet tall when we launch, so the doors should ideally be at least 15 feet tall and 10 feet wide.
CHASE VEHICLE
If participants would like to help us chase and recover the payload after the launch (highly encouraged!), they will need to have access to an appropriate vehicle. Be thinking about how many participants will be joining us and if any of them will be students. Also consider potential landing locations (see below) and if a 4WD vehicle might be necessary.
On our end, we almost always have a 4WD vehicle for launches since we often find ourselves driving on rough dirt roads at some point during the recovery. We therefore recommend having 4WD/AWD just to be safe. Please keep in mind that, per UW policy, we are not permitted to transport any students in our vehicle(s). If the only ones joining us for the recovery are adults, they can ride with us if there is enough room.
TEACHER’S ROLE
- After receiving the payload boxes, help guide the students in deciding what objects, materials, or experiments to put in them. Contact us with any questions you may have during this process. Make sure that the payloads conform to our rules and weight limits and have them ready to go by launch day.
- Pick out a few potential launch sites and sheltered areas to fill the balloon.
- Consider joining us for the payload recovery! This is always a super fun experience, since it feels like you’re going on a search and rescue, or maybe a scavenger hunt. You don’t have to give us a final decision about this until launch day, but you may need to decide earlier if you’re going to have to reserve a school vehicle to transport students.
STEP 3 — MISSION CONTROL & SOCIAL MEDIA
For each launch, we create a “Mission Control” page for tracking the payload and viewing the live data feed. This page is maintained by Stratostar and is public, meaning that anyone with an internet connection can see it. Click here to see an example of the Mission Control interface for a previous launch that we did in April 2019 with Riverton Middle School. One particularly interesting feature on this page is the live Twitter feed. Each launch is assigned a specific hashtag (e.g., #stratostar0326), and any tweets related to the launch that include that hashtag will appear in the Twitter feed. This is a great way to build excitement leading up to the event and to share updates about the event with parents and others following along online.
Once the launch date has been scheduled, we will send the teacher the link to the Mission Control page as well as the Twitter hashtag. Prior to the launch, Mission Control will only show the Twitter feed and a countdown to the launch. Live GPS tracking and monitoring of the SatCom data feed are not available until the SatCom is turned on and activated on the day of the launch.
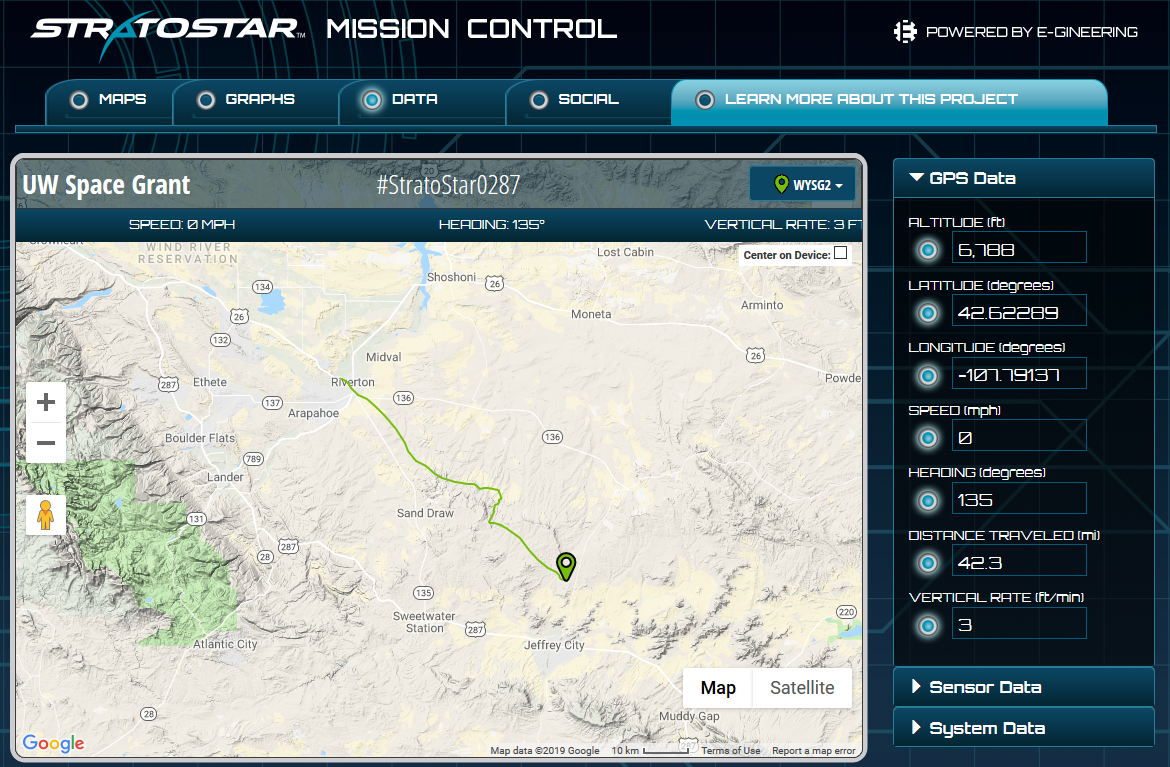
Mission Control – Tracking Map & Data Feed

Mission Control – Graphs

Mission Control – Twitter Feed
Of course, participants do NOT need to have a Twitter account to participate in a balloon launch. However, if any teachers/schools do have Twitter accounts, we strongly encourage them to take advantage of this opportunity and have some fun with it. Share the Mission Control link with students, teachers, and parents. Let others know that if they are on Twitter, they can use the hashtag to indirectly participate in the event as well. Schools may also think about spreading word of the launch on their websites and other social media platforms.
Teachers/schools are also more than welcome to contact local news organizations and let them know about the event. We find that local newspapers and TV stations in Wyoming are often quite eager to cover our launches (e.g., see here, here, and here). We only ask that the Mission Control link be kept “in house” until after the launch and payload recovery. In other words, please do not share directly with reporters or the general public. We’d rather not risk having random folks out chasing the balloon and trying to recover our payload before us.
TEACHER’S ROLE
Spread the word! Get others at the school involved. Send the Mission Control link to other teachers, students, parents, etc. If so inclined, start tweeting and/or invite local news to cover the event.
STEP 4 — MONITORING THE FORECAST
WEATHER FORECAST
The primary weather concerns for balloon launches are wind, snow, and thunderstorms. An ideal launch day would feature very light winds (5 mph or less), comfortable temperatures, and no precipitation. Clear skies would be an added bonus. However, the weather in Wyoming often does not cooperate with our launch plans, especially during the windy season from November through April. Even just moderately strong winds by Wyoming standards (>20 mph) can make it nearly impossible to safely inflate and launch a balloon. Snowfall and snow cover can be problematic in terms of travel safety and road access during payload recovery. Of course, thunderstorms include obvious hazards such as lightning, wind, and hail.
We begin monitoring the weather forecast for launch day at least a week prior to the event. Such forecasts are typically not very reliable past about 7 days. However, within 3 days they can actually be quite reliable. We usually consult multiple weather sources, including the National Weather Service. In fact, the weather service produces hourly forecast graphs for every location (e.g., click here to see the one for Laramie) that have been very helpful in the past. Sometimes we may even look directly at the actual forecast maps produced by the computer models. One important factor we consider throughout all this is forecast consistency. Generally, the more consistent the forecast is during the week leading up to the launch, the more confidence we can have in it.
When looking at forecasts for locations in Wyoming, we also consider the following:
- High pressure systems tend to produce favorable launch conditions
- Low pressure systems tend to produce unfavorable launch conditions
- Pressure gradients between high and low pressure systems usually produce windy conditions
- The wind near the ground is typically weakest at night and in the first 3–4 hours just after sunrise
- Wind speed and direction can sometimes change drastically only a few hundred feet above the ground
- Upper-level winds are typically stronger in winter and weaker in summer
- Upper-level winds are typically stronger around low pressure systems
- Thunderstorms are most common in the afternoon
- On clear days, the balloon is usually visible to the naked eye all the way up to 100,000 feet
FLIGHT PREDICTION & LANDING LOCATION
Prior to a launch, there are several balloon flight prediction websites that can calculate an estimated flight trajectory of a balloon/payload. We use the Balloon Landing Predictor from Cambridge University in the UK. However, all of these websites essentially do the same thing. They first use a weather forecasting model to obtain a forecast of the wind speeds and directions at various levels of the atmosphere for the specific time and location of the launch. They can then calculate a 3D trajectory estimate of the payload for the entire flight (both ascent and descent).
descent). This not only gives us an estimate for where the payload will land, but also helps us decide if it’s worthwhile to launch on that particular day.
The Cambridge University website utilizes the Global Forecasting System (GFS) model, which updates every 6 hours. It will only calculate flight predictions for launch times less than 180 hours (7.5 days) into the future. For our launches, the predicted landing locations from this website (obtained right before the launch) have deviated from the actual landing locations by anywhere from as little as 1 mile to as much as 19 miles. On average, we have found that the predicted landing locations are usually accurate to within about 7 miles.
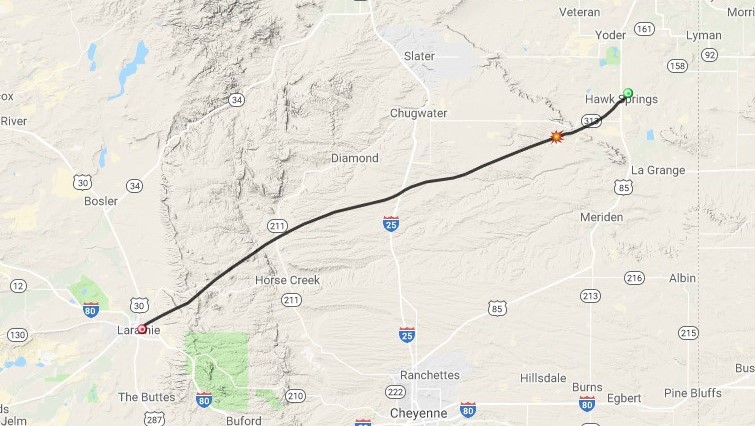
Balloon Flight Prediction
TEACHER’S ROLE
- Feel free to monitor the weather forecast on your own. As we get closer to the launch, we will begin discussing the weather forecast with you in more detail.
- One week before the launch we will set up a flight prediction simulation for your launch date/location and send you the link. You can manually update that simulation every day (or even every 6 hours) with your students to see how the flight prediction changes.
STEP 5 — LAUNCHING THE BALLOON
BEFORE LAUNCH DAY
We continue to monitor the weather forecast and balloon flight predictions leading up to launch day. If either of these do not look favorable for a launch, we may be forced to postpone the launch until a later date. This decision will typically be made 24–48 hours before the launch.
The day before the launch, we typically meet with the teacher in person (usually after school lets out) to make sure everyone is ready for the launch the following day. During this meeting, we will discuss logistics, go over the launch procedures, and make a final determination of where to fill and launch the balloon. If necessary, we may also need to spend some time finishing up student payload preparation. It is better to do all of this the day before the launch instead of the morning of.
DAY OF LAUNCH
Launch day can be quite hectic. To give us enough time to set up, we will usually arrive at the launch location at least 90 minutes before the scheduled launch time. Setting up for the launch involves laying out all our equipment where we plan to fill the balloon, connecting the regulator and hose to the helium cylinder, attaching the payload lines to the bottom of the balloon, and making sure all the payload items are accounted for and ready to go.
About an hour before the launch, we activate the SatCom which then begins transmitting data to the Mission Control page once every 15 minutes. We also turn on our backup SPOT GPS devices at this time and set them to tracking mode. These provide location updates every 10 minutes.

Launching a Balloon
It is then time to begin filling the balloon. This usually takes about 20 minutes under normal conditions. If it is breezy, we may have several teachers or students help us stabilize the balloon to prevent it from flopping around in the wind. Once the balloon is filled and has enough free lift to carry the payload with an adequate ascent rate, we check all the payloads one last time and turn on the GoPro cameras. We also do a final check of our GPS units to make sure they are correctly transmitting the location of the balloon. If there are no issues, it is time to launch!
THE LAUNCH
We often have the teacher choose a handful of students to help us walk the balloon payload train out to the launch location. Once we are ready to launch, we do a countdown and release the balloon. This is always an exciting moment. As the payload begins to fly, the SatCom will automatically begin transmitting the data to Mission Control once every minute. The balloon chase has begun!
TEACHER’S ROLE
- Make sure your student payloads are finished and ready to go the day before the launch. The morning of the launch, you will mainly be responsible for making sure the students behave and do not interfere with any of the launch operations.
- You may bring your students over to watch us set up and inflate the balloon as early as you would like. However, if other teachers are planning to bring their students out to watch the launch as well, we suggest that they show up no more than 30 minutes before the scheduled launch time.
- We may ask you and some of your students to help us keep the balloon stabilized if it is windy at all. We may also have you choose a few students to help us carry the payload items out to the launch location.
STEP 6 — CHASE & RECOVERY
THE CHASE
Immediately following the launch, we check once again to make sure that data is being transmitted to Mission Control. It sometimes takes a couple minutes to update, but eventually data should start transmitting every minute. We also check the balloon’s ascent rate to see if it matches what we were aiming for (usually close to 1,000 feet/minute).
After cleaning up our equipment, it is time to begin chasing the balloon. Depending on how far away the payload is expected to land, we may not have to leave the launch location immediately. However, we always try to be relatively close to the expected landing location by the time the balloon bursts, all the while maintaining an internet connection so we can continue to monitor the position of the payload.
Once the payload is back on the ground, we consult our maps to figure out the quickest, easiest way to reach it. The better the road network, the easier the recovery (usually). Google Maps is often trustworthy in these situations, although we have found that it occasionally takes us down dirt/gravel roads that either don’t actually exist or are on private property. Most of the time, however, we do plot a course that brings us to within a mile or so of the payload.
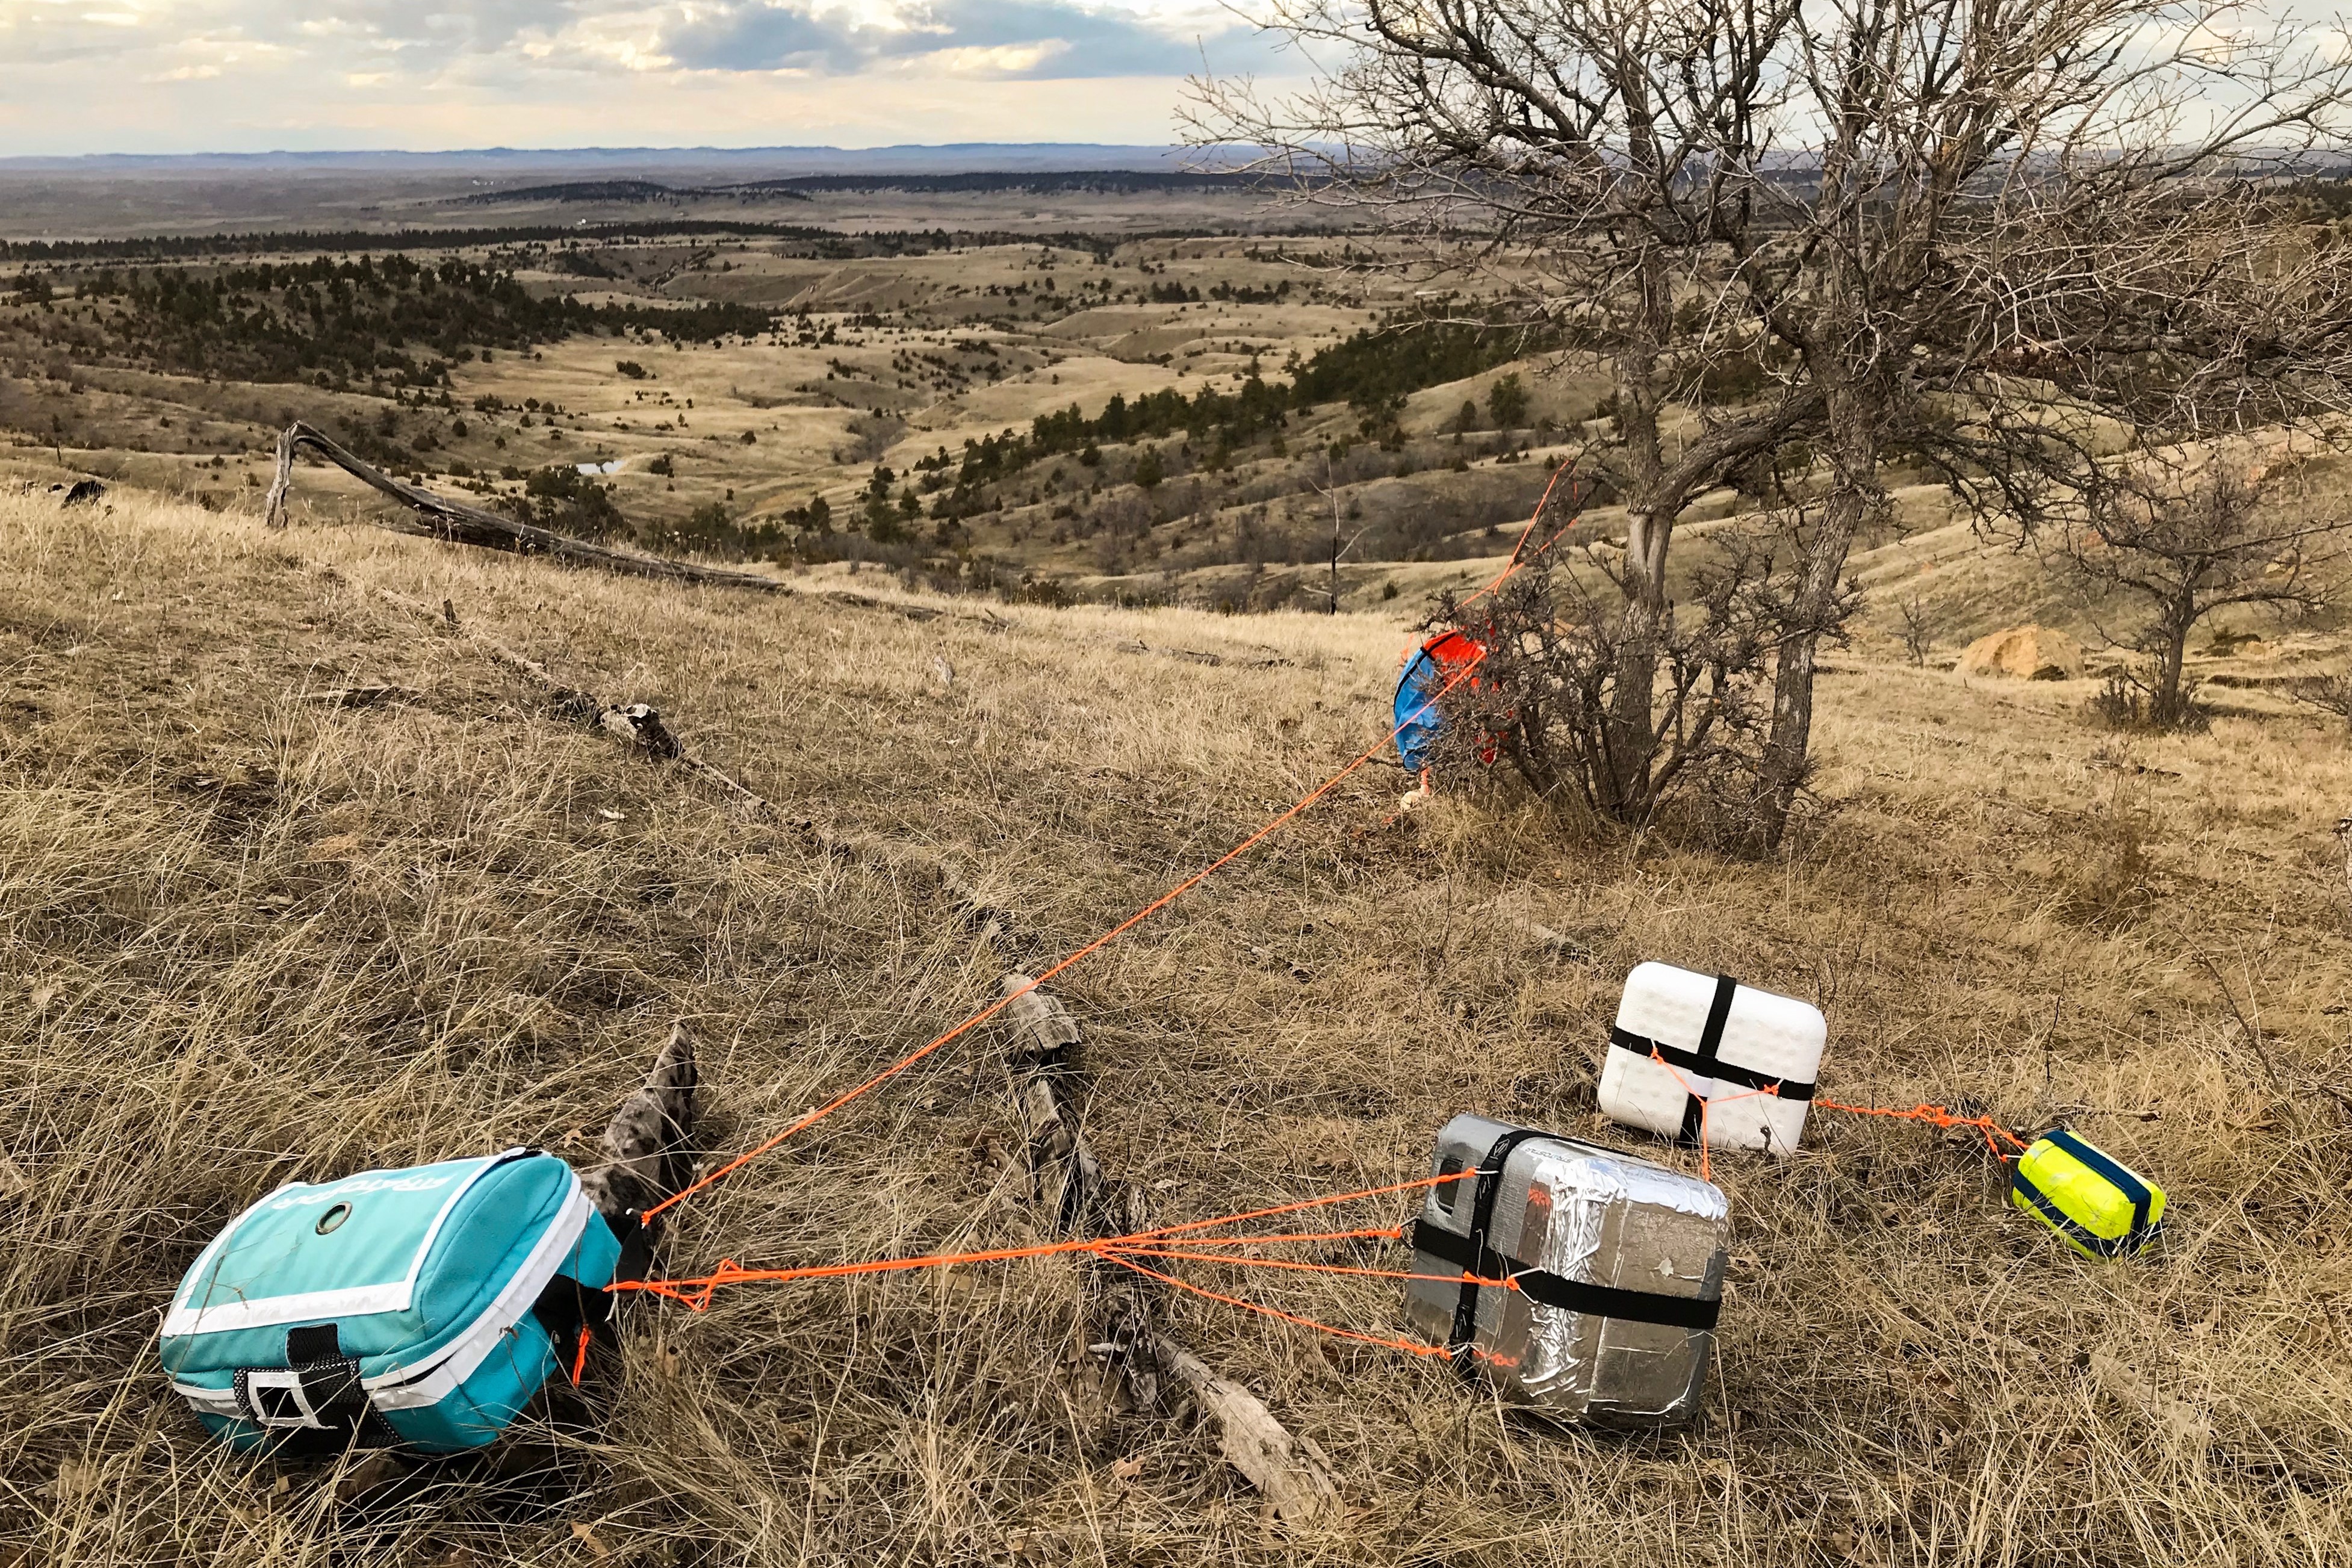
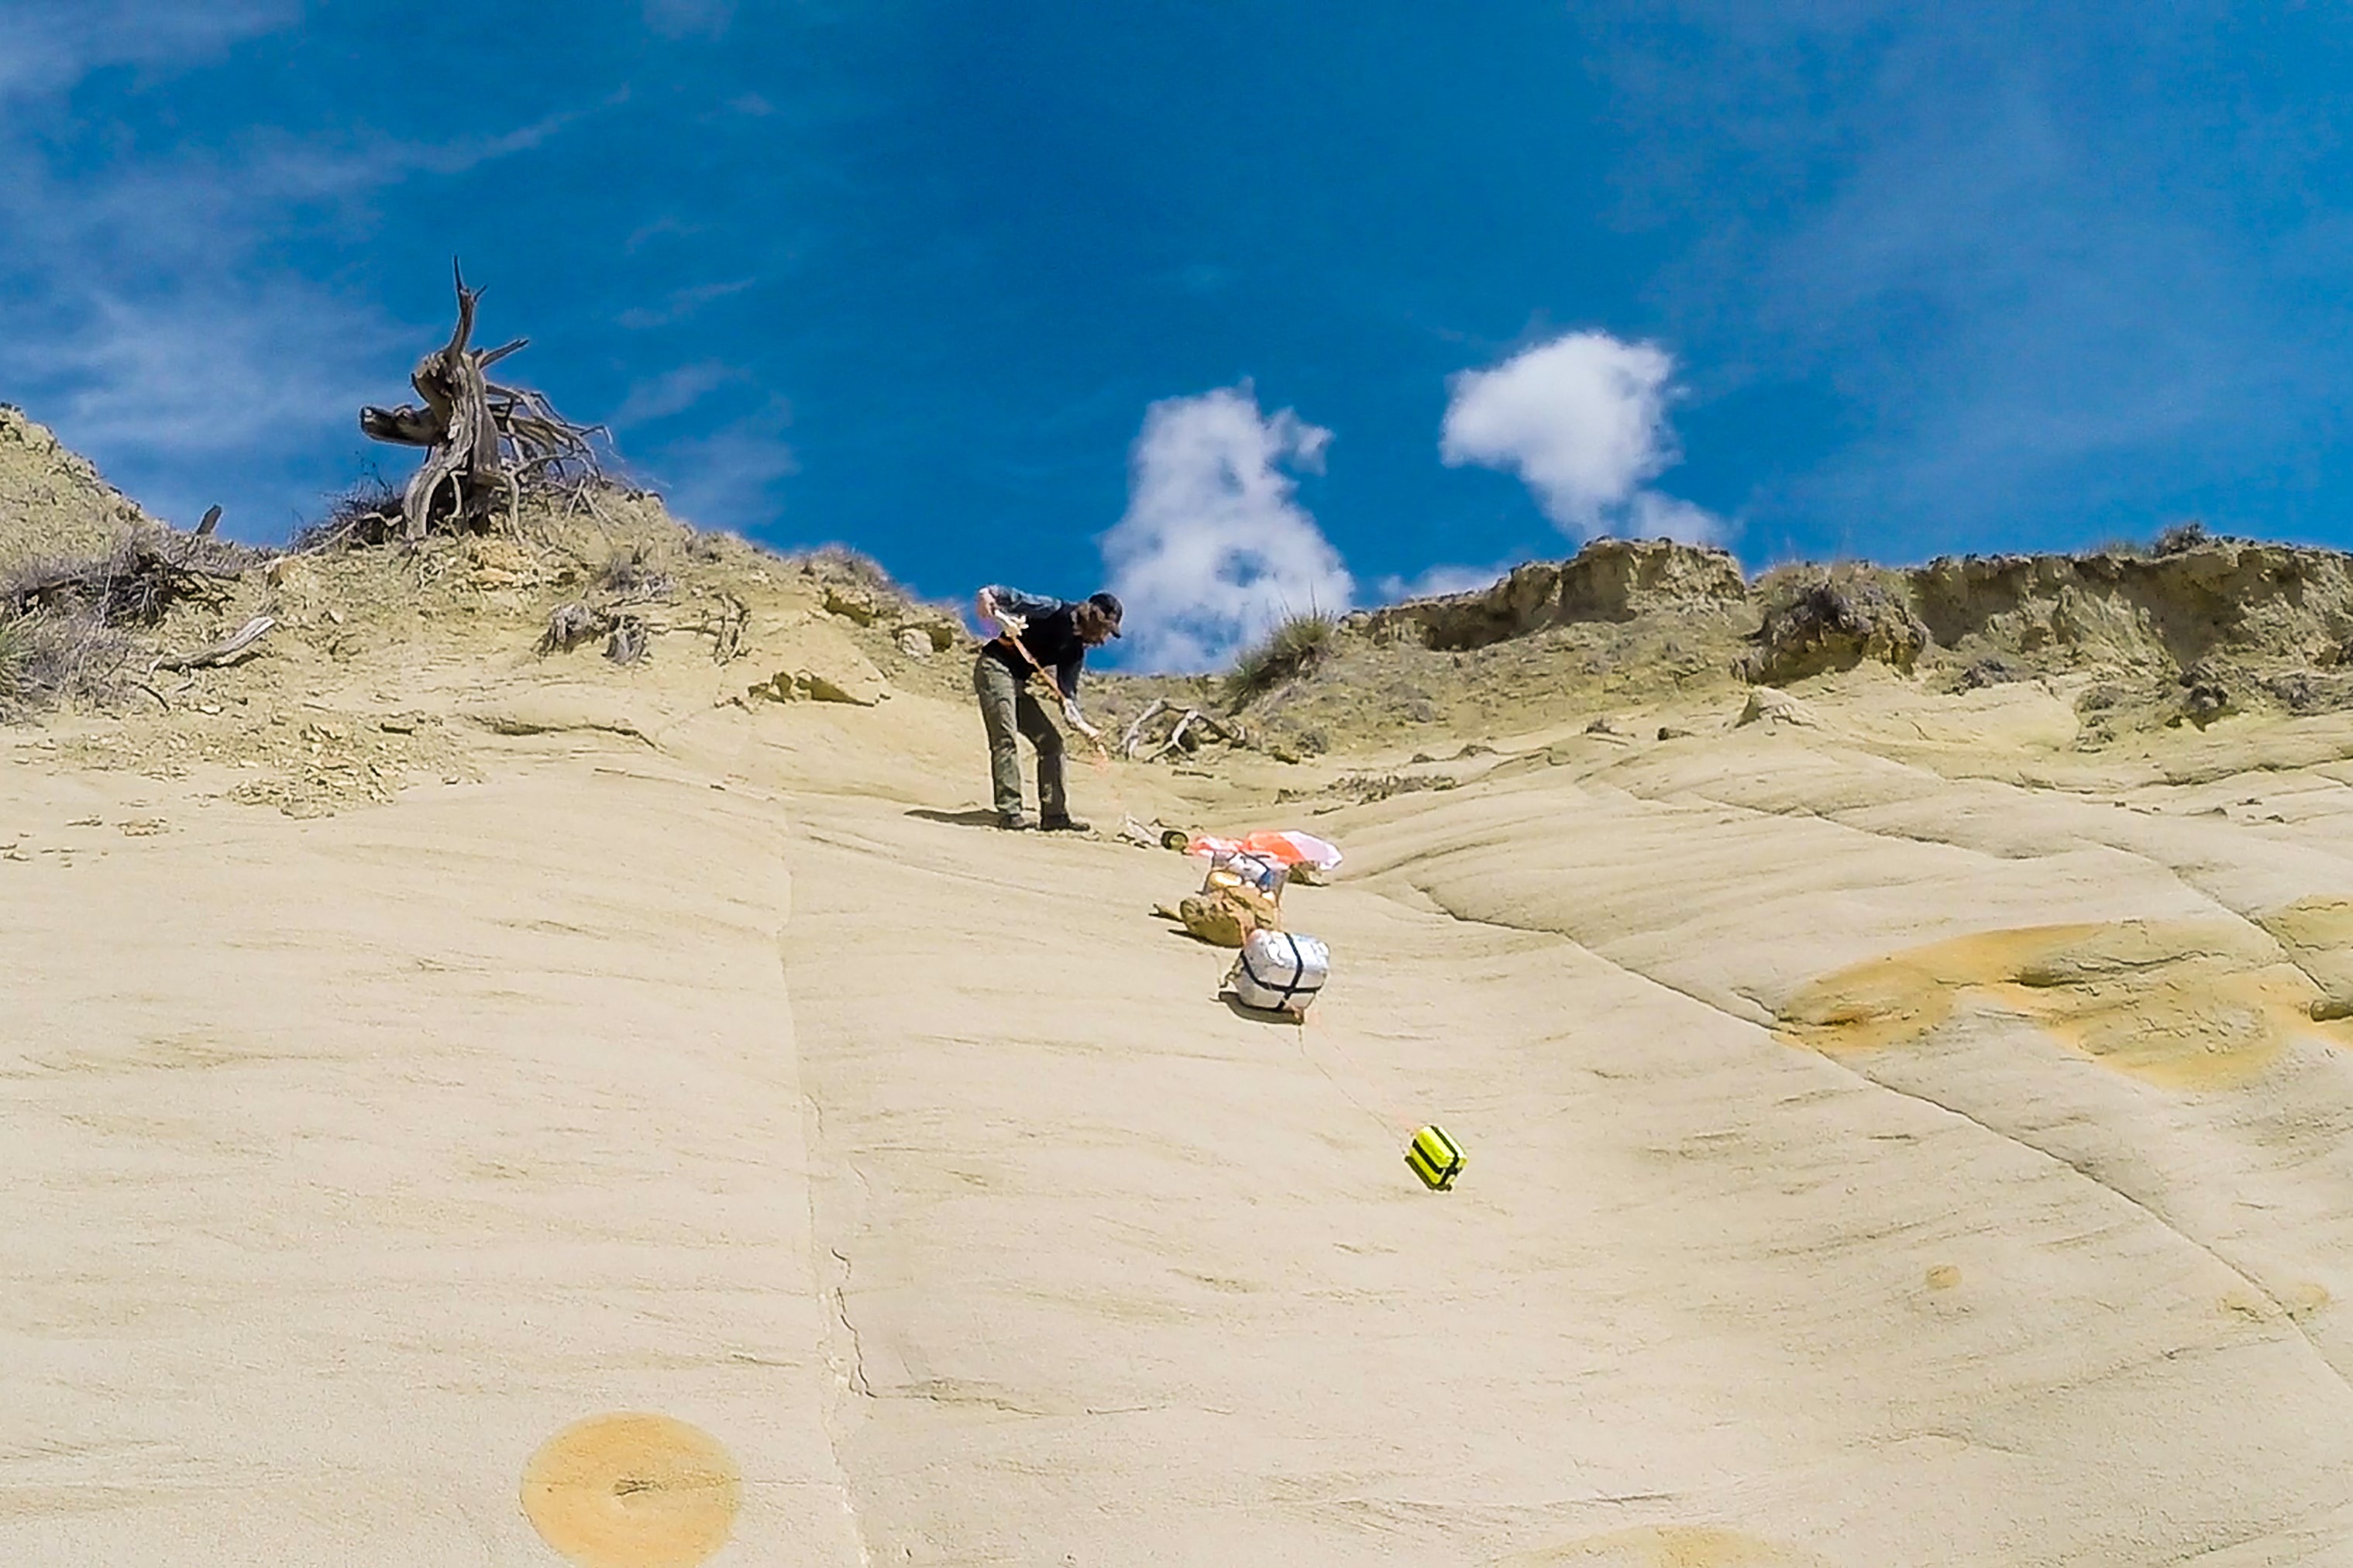
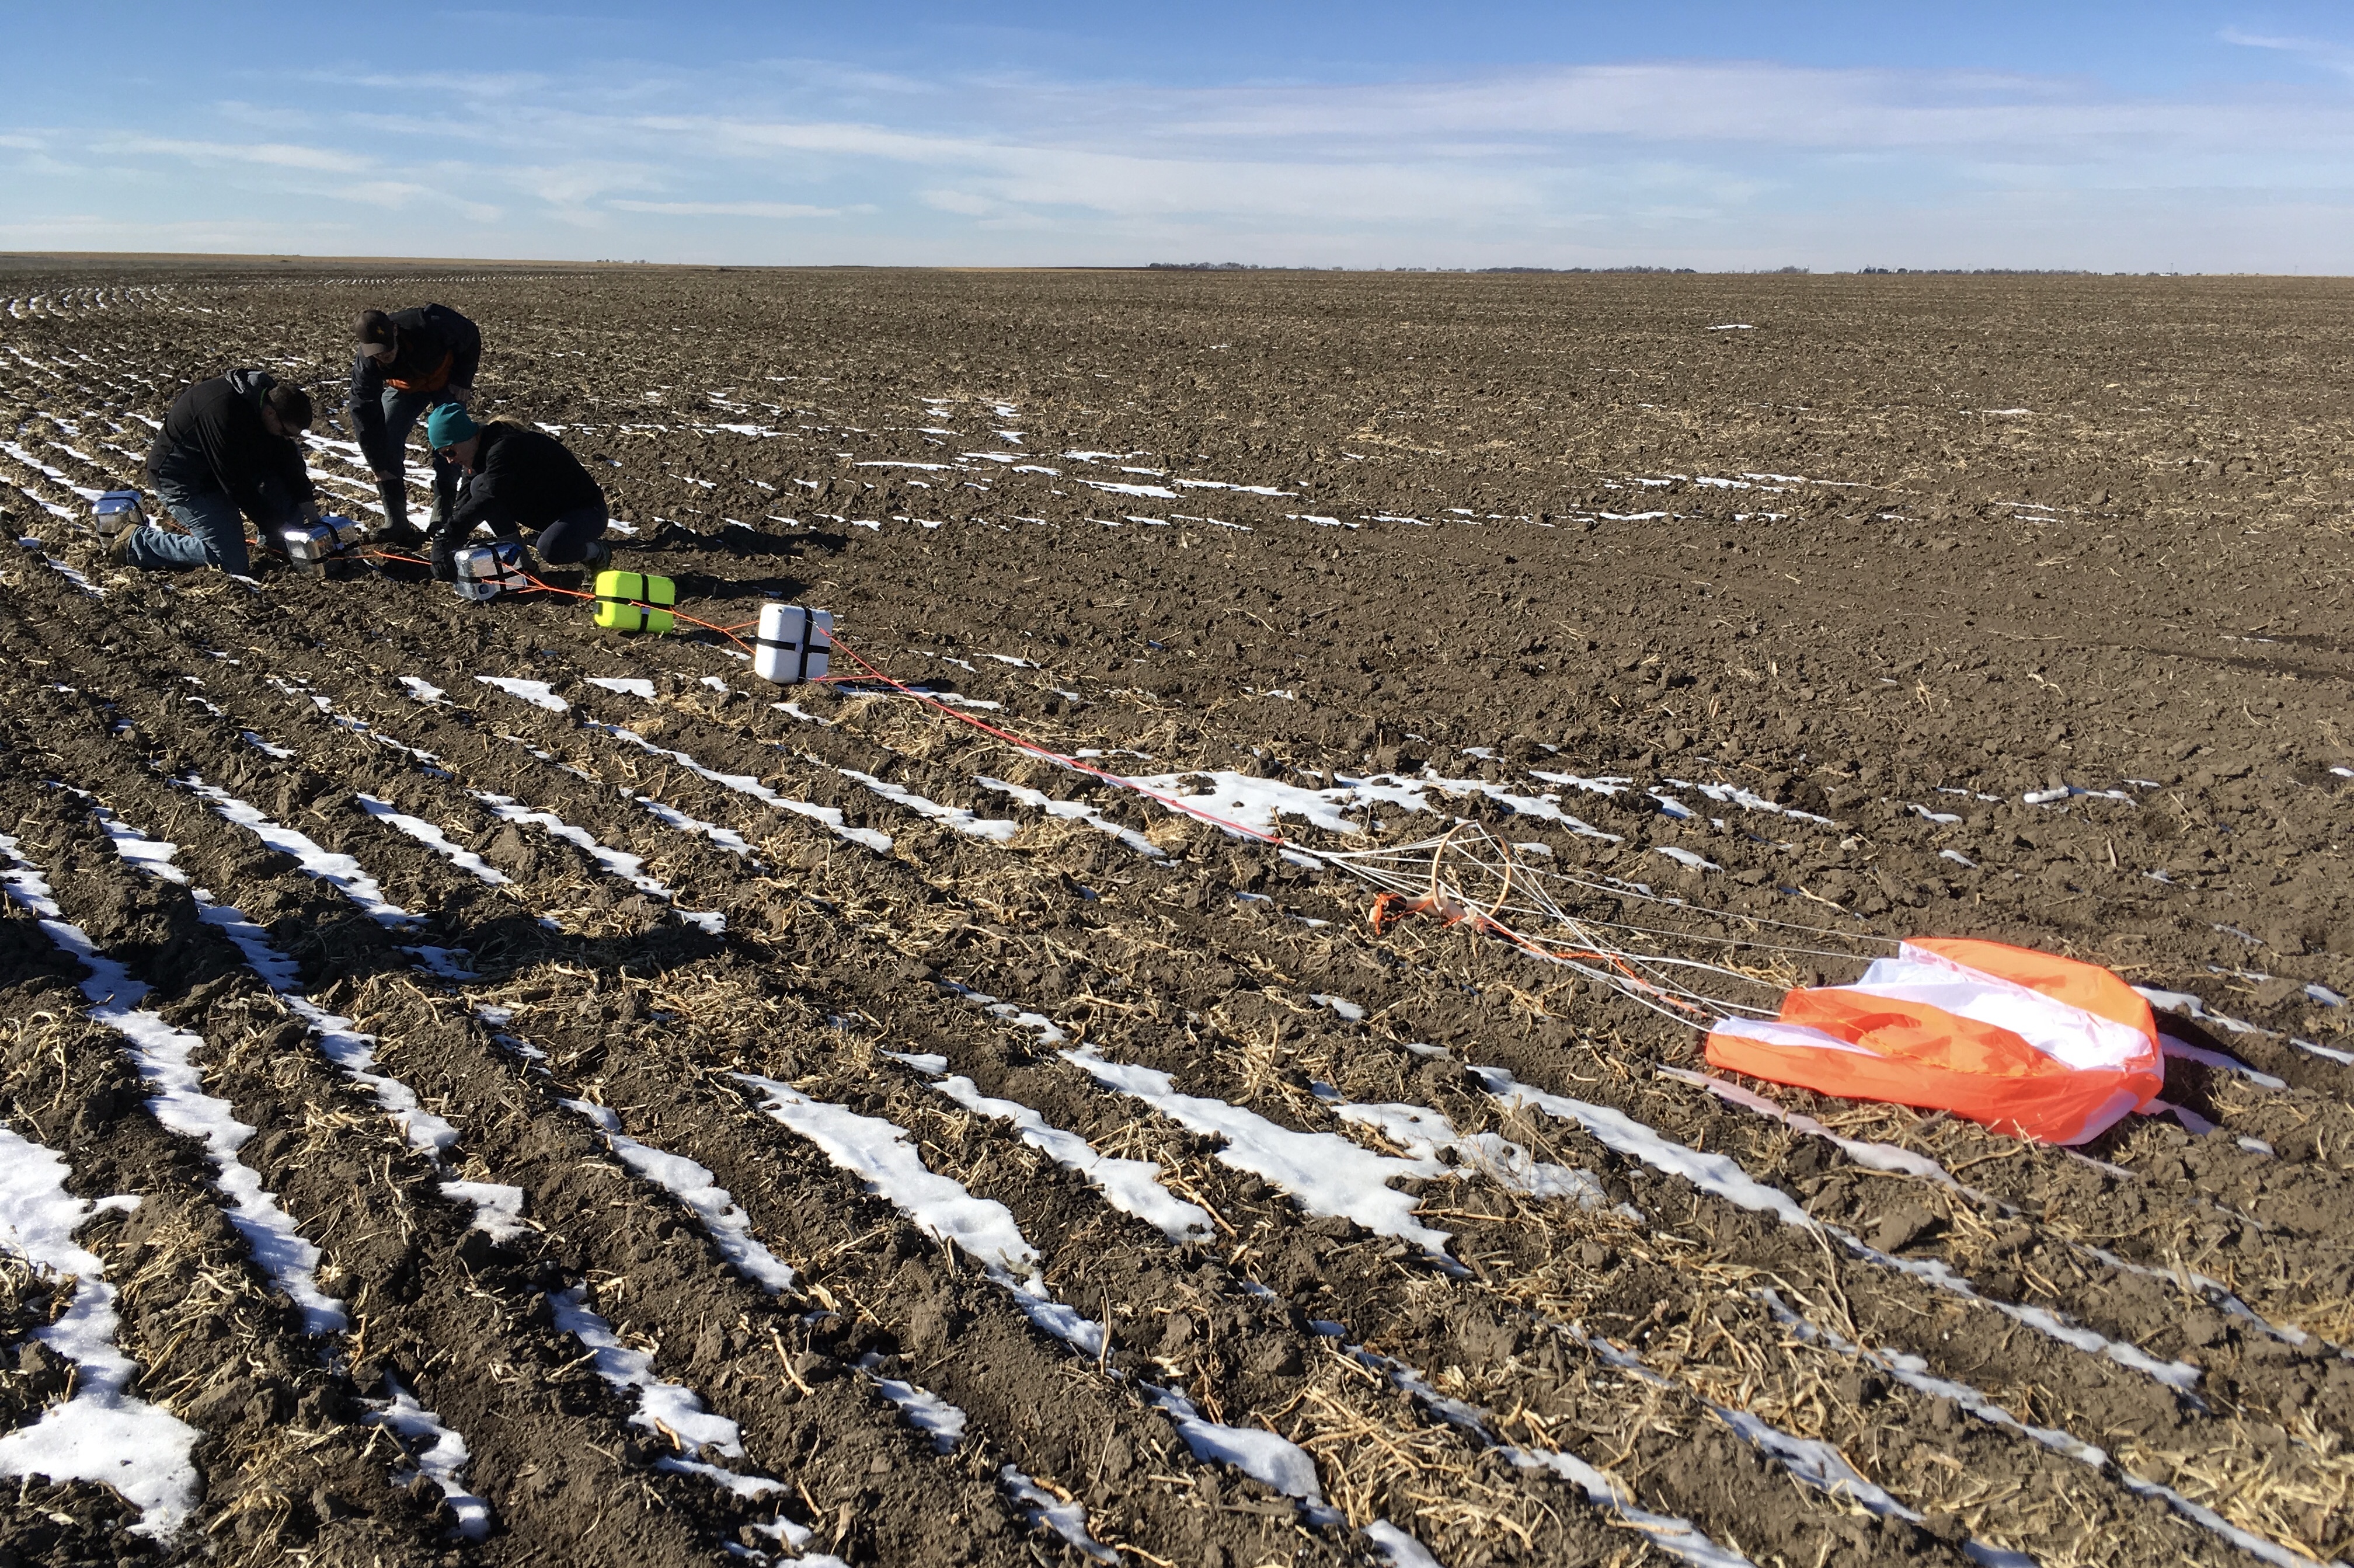
THE RECOVERY
To date, about 25% of our payloads have been recovered on public land (usually either BLM or National Forest) while the rest have landed on private property. If the payload falls on public land, the recovery tends to be quite straightforward. We drive in as far as we can and then walk the rest of the way. Access is typically not an issue unless we encounter roads that are unexpectedly closed or impassable (e.g., due to snow, moving water, mud, etc.).
If the payload lands on private property, access becomes more of an issue. We always attempt to contact land owners in these situations. Most of the time, we are successful and the land owner grants us permission to go on their property and retrieve the payload ourselves that same day. In other cases, the land owner may decide to retrieve the payload for us.
However, contacting a land owner can sometimes be challenging because land ownership information is not always easy to find for a given piece of property. Even if we do determine who owns the land, the owner may not be very responsive to our phone calls or emails. In the rare instances when this happens, we have found that it is often helpful to reach out to neighbors or other nearby property owners. They can usually point us in the right direction or provide us with the information we need to speak with the land owner.
Most recoveries require at least a short hike (i.e., less than a mile), since payloads don’t usually land on roads. In fact, we have had three payloads land within one or two hundred feet of a public road, making the recovery a piece of cake. On the other hand, the longest hike we’ve had to do was about 10-12 miles roundtrip. In that case, the payload landed on National Forest land deep in the Laramie Range southeast of Casper, WY. We do our best to prevent situations like that from happening again in the future.
TEACHER’S ROLE
- If joining us for the chase and recovery, you will need to make sure you have your own vehicle if students are involved. If students will not be joining, you may be able to ride in our vehicle. Check with us prior to the launch to see if this is a possibility.
- Everyone going on the recovery should wear clothing and footwear that is appropriate for a potential hike. Do not wear sandals or any open-toed shoes. We also recommend bringing extra layers or a jacket, especially if the weather is going to be on the cooler side.
- Finally, make sure to have plenty of water and snacks (or even a packed lunch!) in case the recovery takes longer than expected.
STEP 7 — FOLLOWING UP
DATA ANALYSIS
Our standard balloon launch events do not currently come with any curriculum for data analysis or follow up. However, if teachers would like to do any post-launch data analysis on their own, we can provide them with the full dataset from the SatCom. This includes all the meteorological and GPS data during flight and is formatted in a CSV file that opens up in Excel.
We are also willing to provide teachers will the RAW video footage captured by our GoPro cameras. Please beware, this footage takes up a lot of computer storage space, often about 100 GB or more per launch. Teachers would be able to download the footage to their own computers using a Dropbox or Google Drive link that we provide.
HIGHLIGHT VIDEO
Following most of our launches, we create a ~5 minute highlight video and upload it to our YouTube channel. These videos spotlight the most interesting parts of the launch event, including the balloon burst as captured by our GoPro cameras aboard the balloon payload. It sometimes takes us a few months to put these videos together due to time constraints on our end. If teachers want to see the onboard video footage earlier than that, they can request a link to download the raw footage.
Please note that our raw footage will likely show student faces and other identifying features. If this is an issue, we can blur out student faces in the highlight video that we upload to the web. We always make sure ask beforehand if we have permission to share photos or videos that include students to our social media channels.
TEACHER’S ROLE
- After the launch, you can ask us to send you the onboard data from the SatCom as well as a link to download the raw video footage.
- Be prepared let us know if we have permission to show your students’ faces in any photos or videos that we share on social media. If we don’t, we can blur faces for the highlight video.
- Once we finish the highlight video, we’ll send you the YouTube link. Make sure to share this video with your students, fellow teachers, and parents!